
Skylight Drywall Surround Repair in Santa Rosa: Before & After
Skylights are one of the most common spots in a Sonoma County home where drywall starts to fail first. The angled surface, the framing details, and the seasonal moisture around the flashing all stack the deck against ordinary wallboard. Over the years, the seams open up, the texture cracks, and eventually the whole surround starts looking rough.
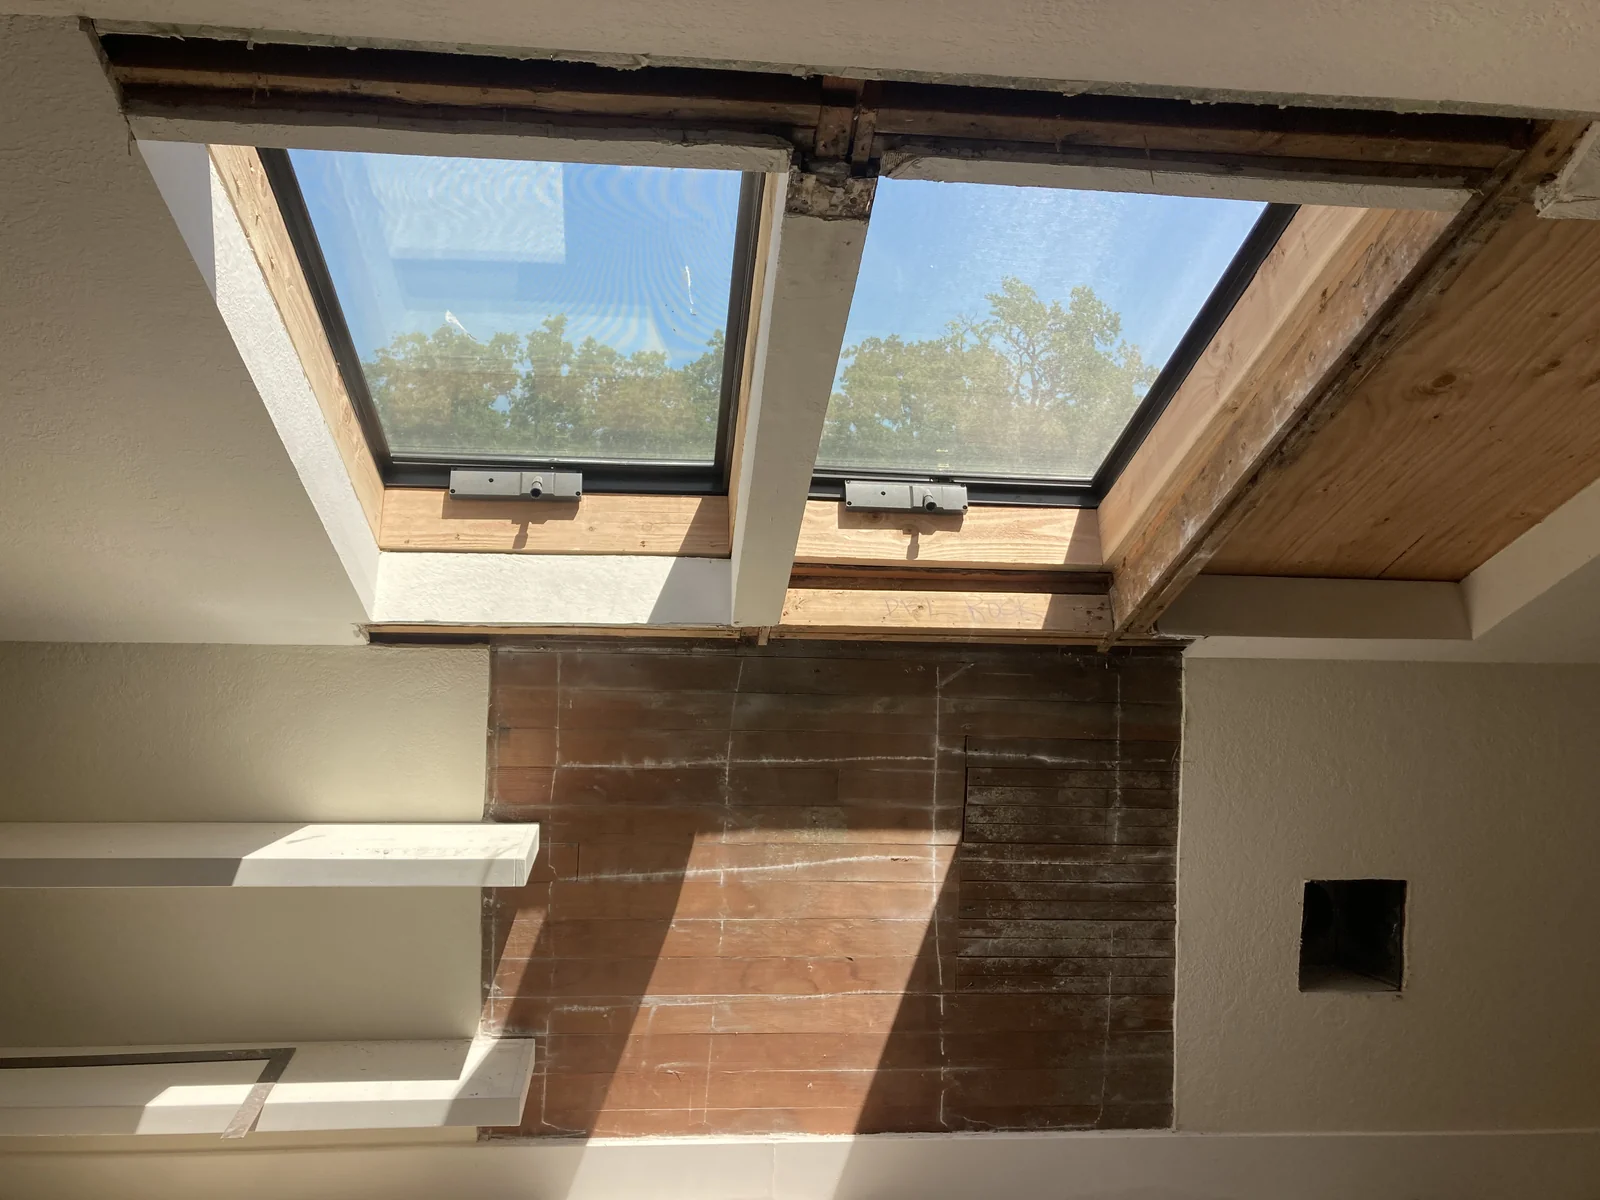
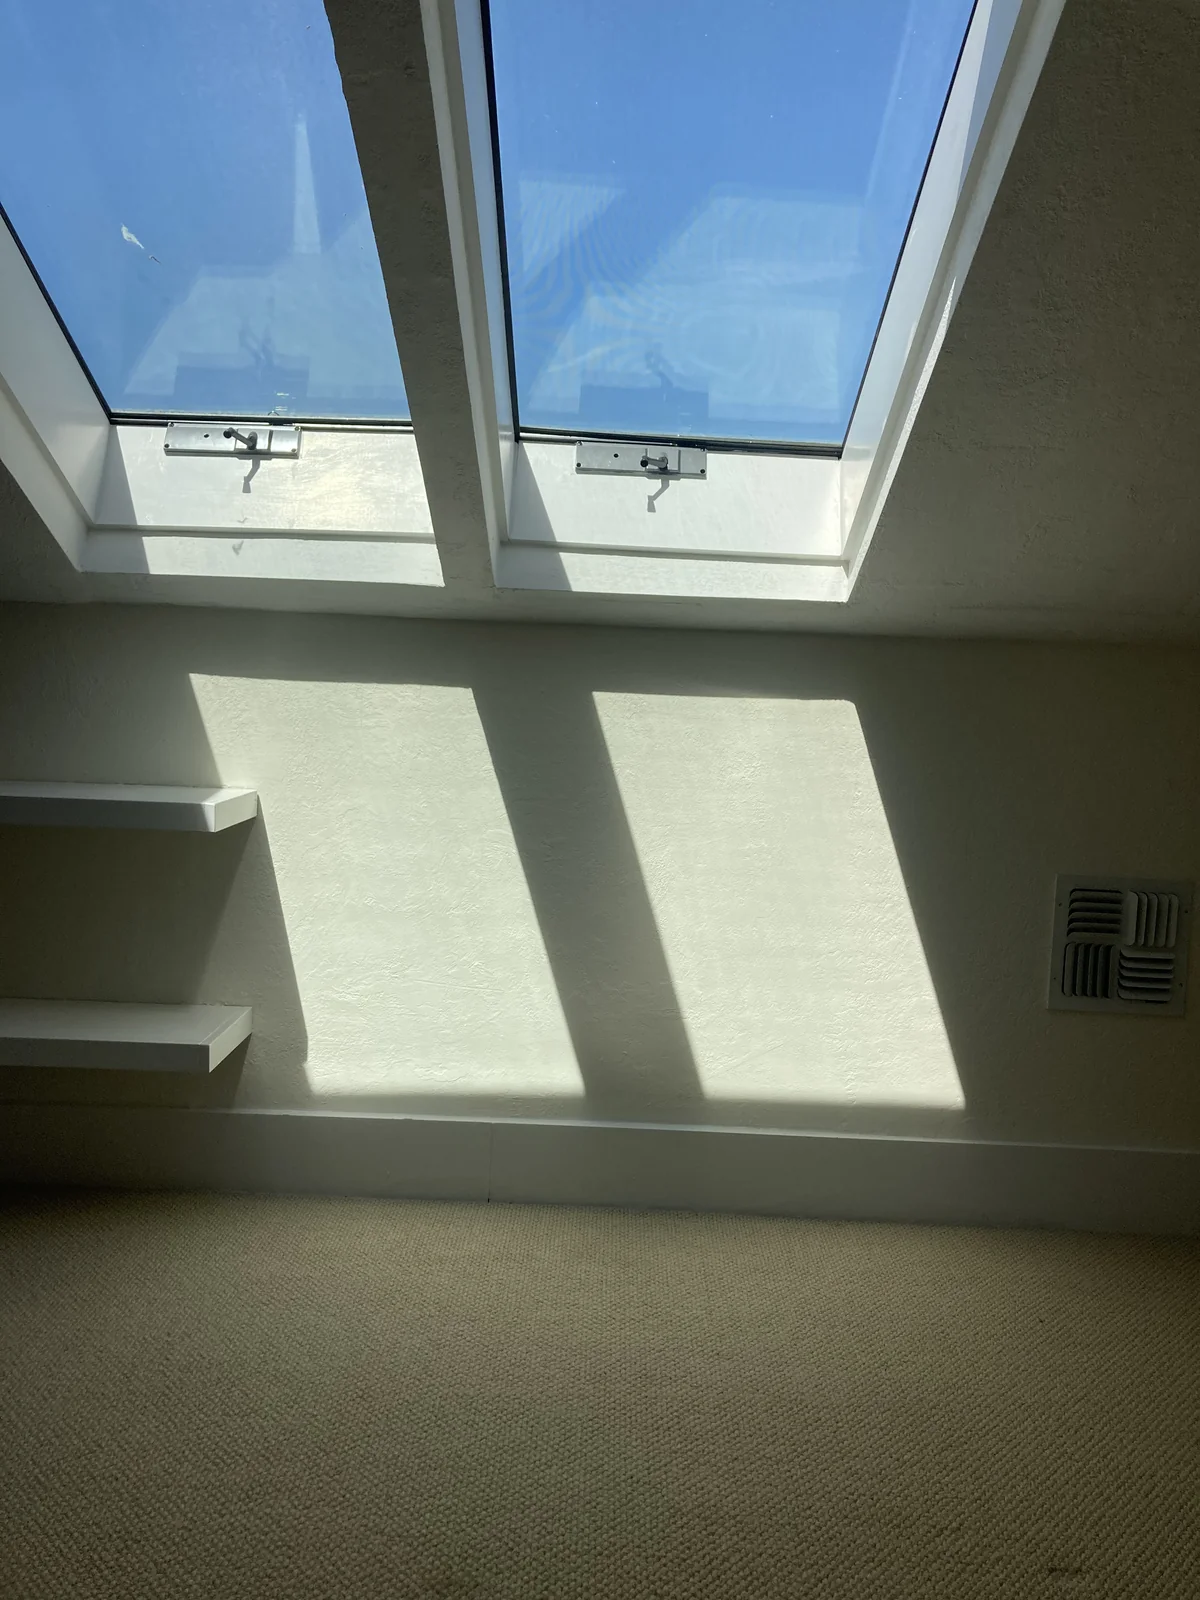
Here’s a recent skylight surround job I did in Santa Rosa. Same room, same skylights — before the work and after.
Why skylight drywall fails first
Three reasons, all stacked on top of each other:
- The angle. Skylight surrounds are usually installed on a vaulted or sloped ceiling, which means the drywall has to wrap around angles instead of sitting flat. Wrapped drywall is harder to mud cleanly. Once one seam cracks, the rest follow.
- The flashing. Even a perfectly installed skylight gets a tiny amount of moisture migrating around the flashing, especially after a wet Sonoma County winter. Over years, that moisture works its way into the drywall paper at the corners.
- Thermal cycling. Skylights heat up fast in afternoon sun and cool fast at night. The wood framing around them expands and contracts. Drywall doesn’t love that. Hairline cracks at the corners are almost guaranteed within 5–10 years.
None of those are signs anything is wrong with the skylight itself. They’re just signs the drywall around it has done its job long enough and now needs refreshing.
What this job actually involved
The before shot shows what most skylight surrounds look like once the original drywall has been pulled off. Exposed beams, the raw paneling on the back wall, and the actual skylight framing visible. From this point, the work goes:
- Inspect the framing. Before any new drywall goes up, I check the wood for soft spots, water staining, or rot from any past leaks. If anything’s soft, that gets addressed first — new drywall over rotten framing is just hiding the problem.
- Cut and fit. Drywall around a skylight isn’t a single rectangular sheet. It’s pieced — usually four panels meeting around the opening, plus the angled returns into the skylight well itself. Each piece has to be cut to the exact angle of the framing.
- Tape and mud the seams. Three coats minimum, with sanding in between. The corners around the skylight well are the tricky part — outside corners get metal corner bead, inside corners get paper tape and patient mudding.
- Texture match. The new drywall has to match whatever texture is on the surrounding ceiling. For most Santa Rosa homes that’s either a knockdown or a light orange peel. Spraying it on, then knocking it down to the right consistency, is half art and half practice.
- Prime and paint. Two coats of primer, then matching the existing wall color so you can’t tell where the new work starts.
The after shot is what you should expect: clean, painted, smooth corners around the skylights. No visible seams, no texture mismatch. The same skylights, but the room reads as finished instead of in-progress.
When skylight drywall is a handyman job vs. when it isn’t
Most skylight surround drywall work is straight handyman territory. If the existing skylight is sound and the issue is purely the drywall around it — cracks, texture failure, water-stained sections, or refresh after a remodel — one person with the right tools can handle the whole job in a day or two.
Where it stops being a handyman job:
- Active leaks. If water is actively coming through the skylight or around the flashing, the roofer needs to fix the source before any drywall goes back up. New drywall over a wet substrate will fail again in months. See water-damaged drywall and black mold for what to look for.
- Skylight replacement. If the skylight unit itself needs replacing, that’s a roofer job. Once the new unit is in and flashed, then drywall comes back.
- Structural framing damage. If the wood framing around the skylight has rotted through, the structural repair has to happen first — sometimes that means pulling in a contractor with the right framing tools.
For drywall-only work? That’s what I do. Same goes for general drywall repair and installation throughout the house — patches, ceiling work, garage drywall, and full-room installs.
What a skylight drywall surround job typically costs
For a standard residential skylight surround in Santa Rosa, drywall-only repair (no skylight replacement, no framing work, no painting beyond touch-up) typically runs $400–$900. The range depends on:
- How many skylights are in the same room (multiple skylights at once is more efficient than one-off jobs)
- Whether texture matching is straightforward or unusual
- Whether the surrounding paint is a stock color or a custom mix
- Access — vaulted ceilings often need scaffolding or a rolling tower
If full painting of the surrounding ceiling is part of the job, add another $200–$500 depending on the area. I always quote a flat rate after walking the job, never an open-ended hourly.
Other related drywall reading
- Water-Damaged Drywall and Black Mold: What Santa Rosa Homeowners Need to Know
- Should You Cover or Remove Black Mold on Drywall?
- What Thickness Drywall Do I Need?
- How to Float a Ceiling
- When to Call a Handyman vs. a Specialist
Need a skylight drywall surround done right?
If you’ve got cracking, water staining, or just plain ugly drywall around a skylight in your home, send me the photos. I can usually quote off photos plus a quick walk-through, and most jobs get scheduled within the week.
I serve Santa Rosa, Sebastopol, Windsor, Healdsburg, and surrounding Sonoma County.